|
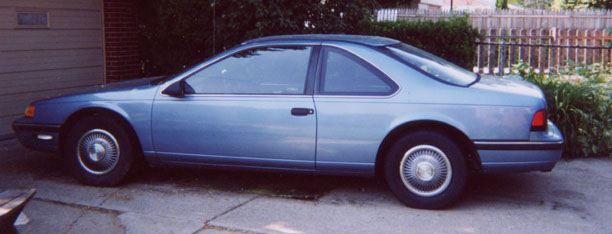
1. Here is the 1989 Thunderbird in its original condition.
|
|
2. The
first step was to remove the side molding so that the painting surface was
uninterrupted. It took six hours to remove all the adhesive.
|
|
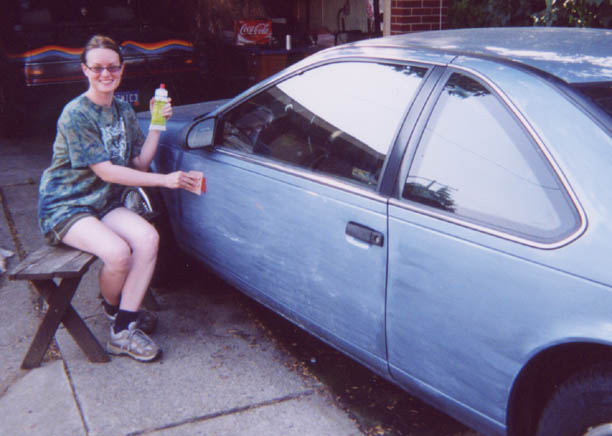
3. Next,
I sanded the entire painting surface with 600-grit wetsanding paper so that the
new paint will stick well. I also repaired minor dents with spot putty.
|
|
4. There
were some rusty spots as well. For these, I used a grinder to remove the
rust and expose the clean, bare metal.
|
|
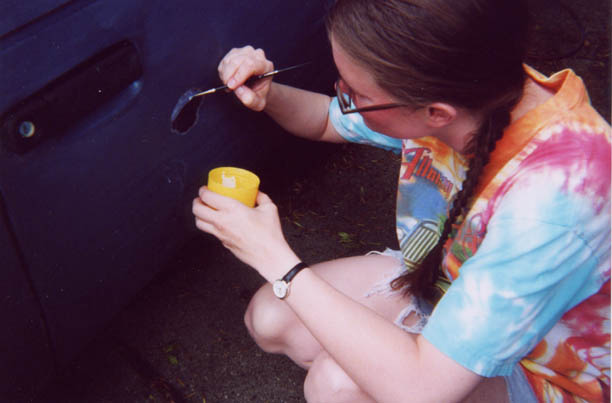
5. Here, I am shown painting rust inhibitor on the exposed metal to help prevent re-rusting.
|
|
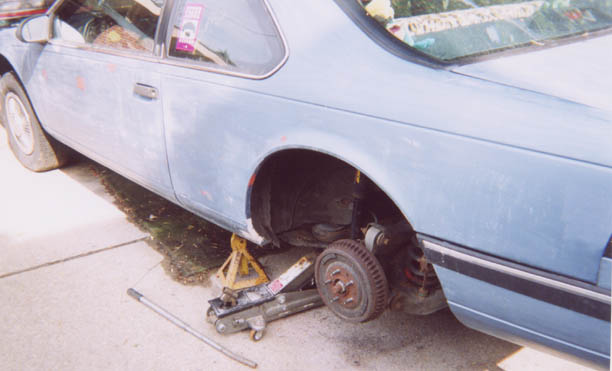
6. I had to remove the wheel in order to repair certain parts because I couldn't get the grinder in such a tight area. Near the left side of the rear fender, you can see where I had to apply some Bondo.
|
|
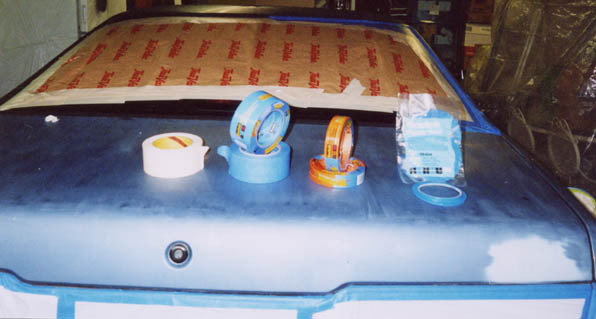
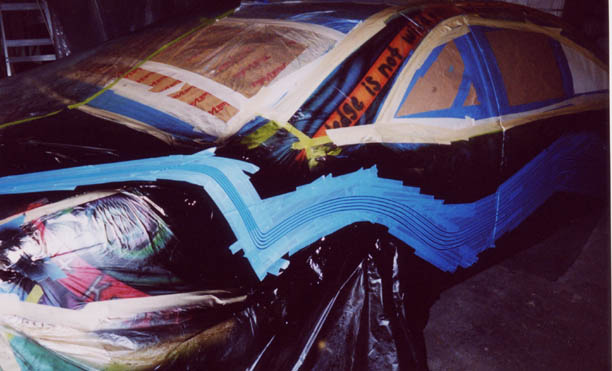
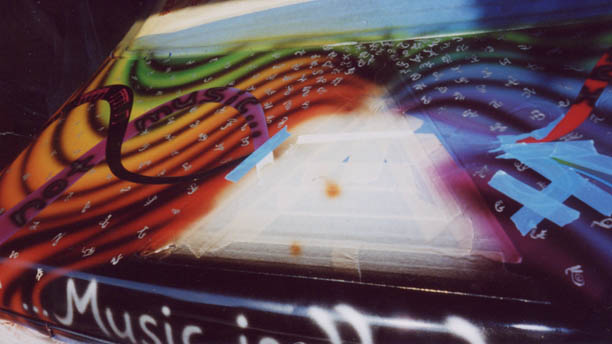
7. The date was July 16, 2003. The Kozmic Dream Machine, my previous art car that "died" of engine failure, was just towed away. Now that my garage was freed up, I could start painting the car. In this picture, you can see the windows and tail lights taped off. Also shown are the different types of tapes I used for the whole process. The four types were masking, 14-day painter's tape, 60-day painter's tape and 1/8" plastic tape.
|
|
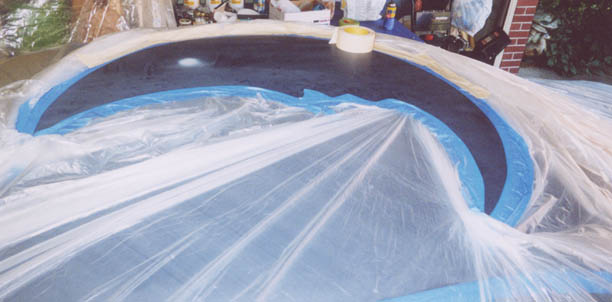
8. Here is the top of the roof showing the moon's perimeter taped off and ready for painting.
|
|
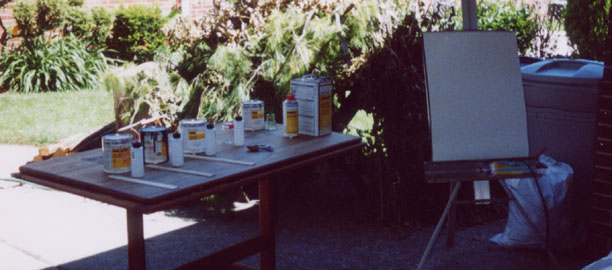
9. This picture shows some of the basic materials I used: acrylic enamel paints, reducer, hardener, airbrush bottles, stirrers and an easel with scrap paper for testing custom paint colors.
|
|
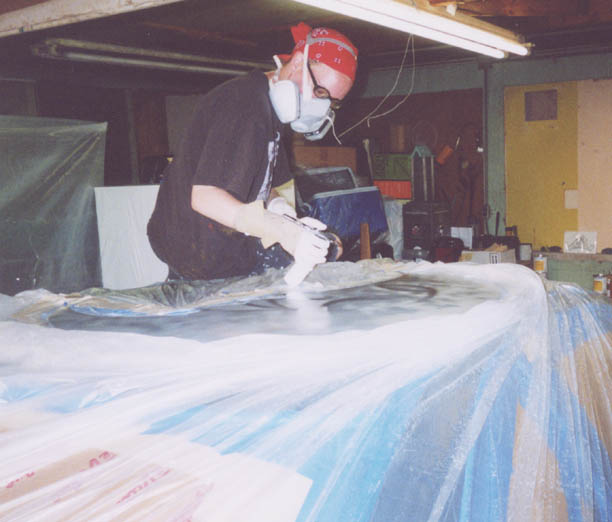
10. The first part I airbrushed was the moon. I used an Iwata Eclipse HP-BCS airbrush for all detail work. Because of the toxicity of the paint and it's tendency to vaporize, it is necessary to wear a respirator. It was quite awkward painting the moon. I was thankful to be able to sit on the roof while I did it. Otherwise, it would be very difficult to reach.
|
|
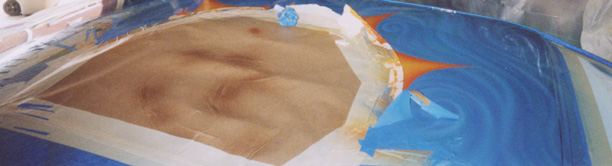
11. Once the moon was sufficiently dry, it was covered up. The area that was going to be the sun's face was the only thing left exposed, shown in the picture. The sun's face was then painted, but I don't have a picture of it.
|
|
12. Then the sun's face was covered up and the rays were taped off and painted.
|
|
13. The rays were then covered up and the sky was painted. This picture shows the sky already painted and the beginning of the removal of the taped-off rays.
|
|
14. Then all the tape was removed and the roof got a clear coat.
|
|
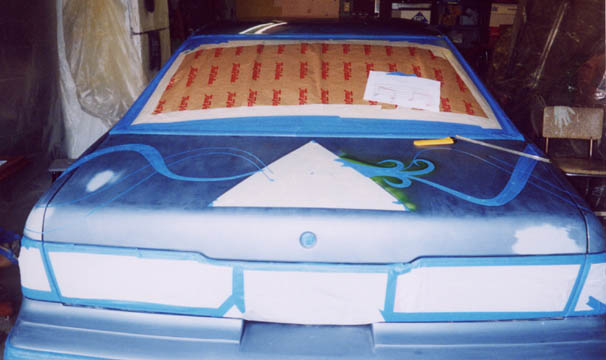
15. Next, God's Eye (the pyramid with three 7's) was painted (not pictured). Then it was covered up. Also covered are the waves that will later be the musical staff.
|
|
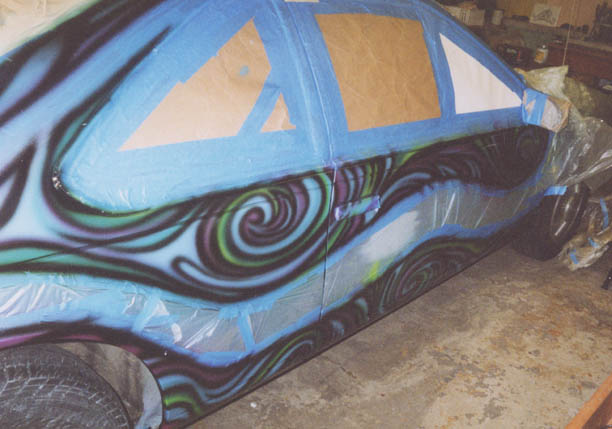
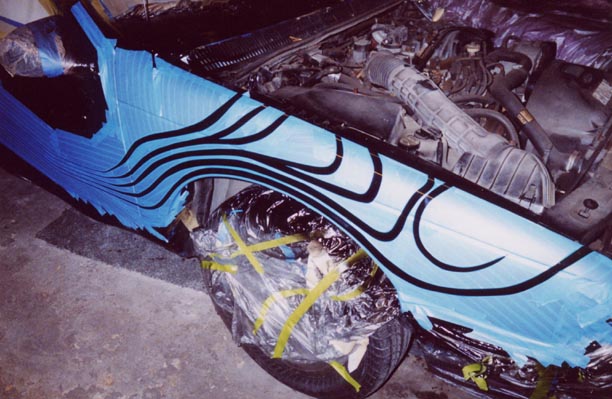
16. This photo shows the side of the car with the musical staff area covered up.
|
|
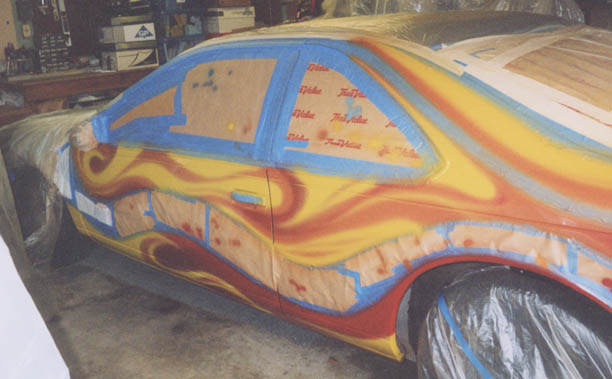
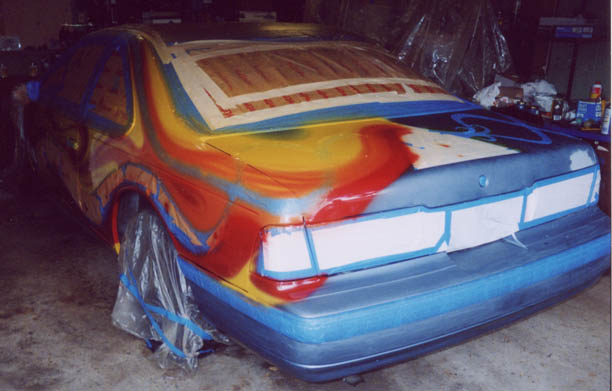
17. Here I have laid out the main colors on the left side. This side of the car is done entirely in warm colors (reds, oranges, yellows). This part was done spontaneously, without drawing out the curves on paper ahead of time.
|
|
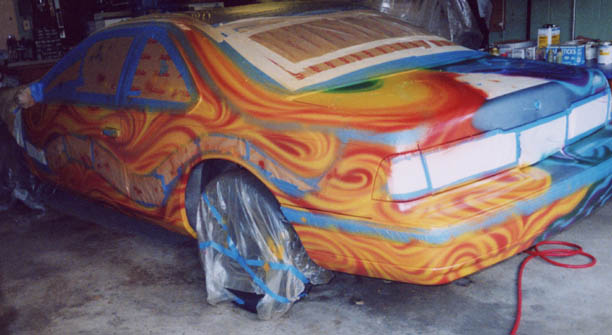
18. This picture shows further details added to the side of the car.
|
|
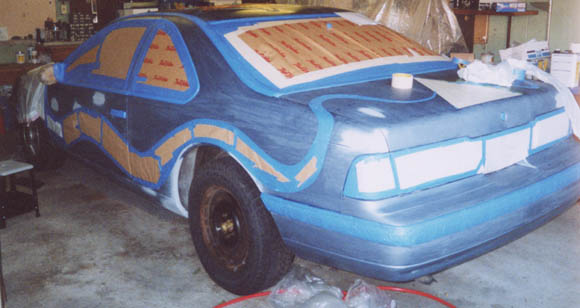
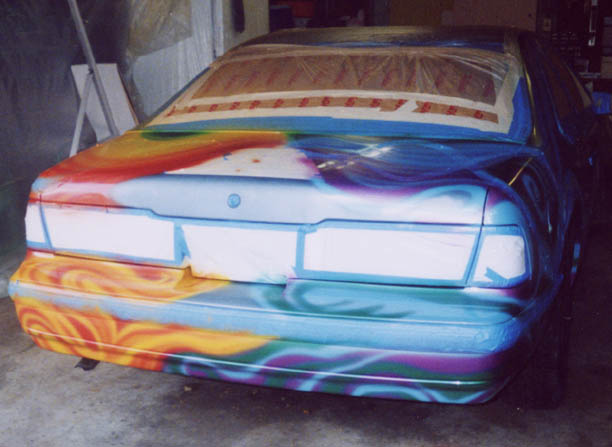
19. This picture shows the right side of the car and the cool colors (greens, blues, violets) that I have laid down.
|
|
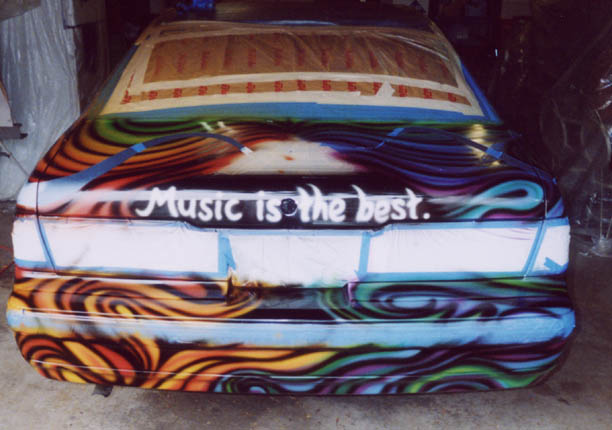
20. Next, I did the trunk which was where the warm and cool colors met.
|
|
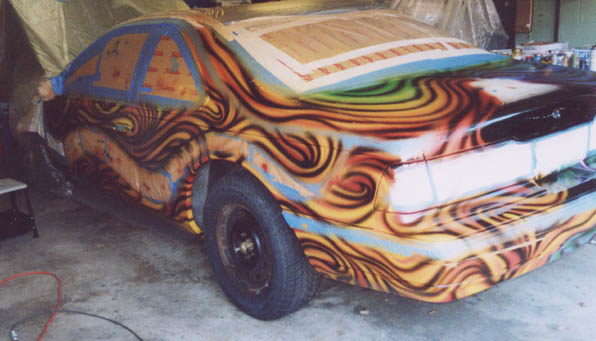
21. Here, details in black have been added to the base colors and "Music is the best" is painted in silver.
|
|
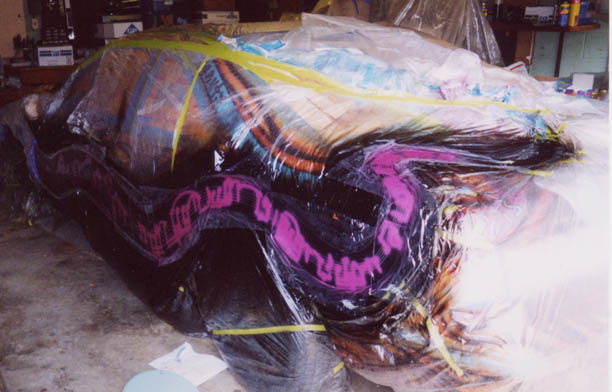
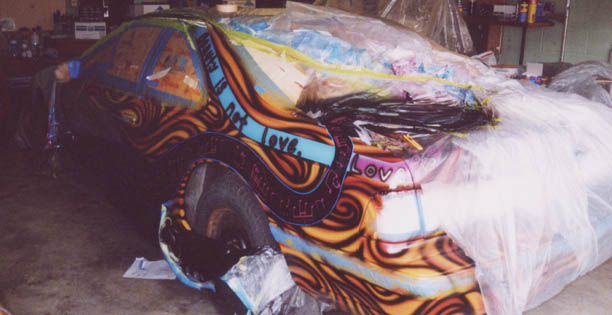
22. Now everything is covered up except the area that will be the Frank Zappa quote. This picture shows the quote already painted. It starts on the trunk heading out of the right side of the pyramid. It reads “Information is not knowledge. Knowledge is not wisdom. Wisdom is not truth." It continues along the left side of the car..."Truth is not beauty. Beauty is not love. Love is not music…” Then underneath the pyramid it says “…Music is the best.”
|
|
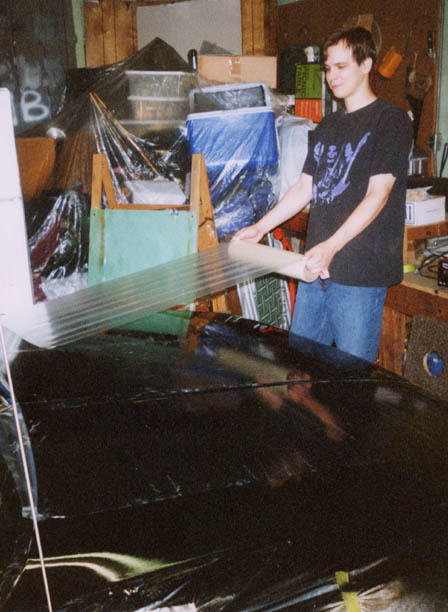
23. I found a new product this time to help with large stencils. It's called stretch mask. After painting the hood black, I used it to cover over the entire hood. It was a two-person job. One person needed to unroll it and the other needed to smooth it flat and keep out bubbles as best as possible. It was not easy. This next process had to be done quickly also because of the instability of the Harlequin paint that Zappa's face and hair would be painted in. It had to go on freshly painted acrylic enamel to work best. This picture shows Brian helping me put on the stretch mask.
|
|
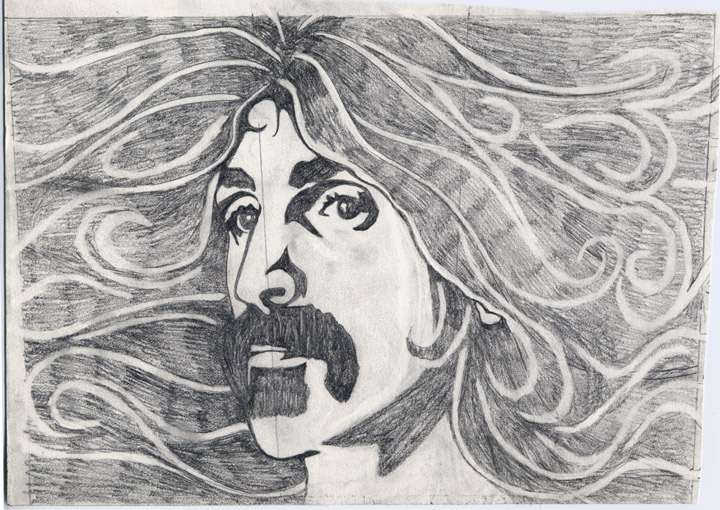
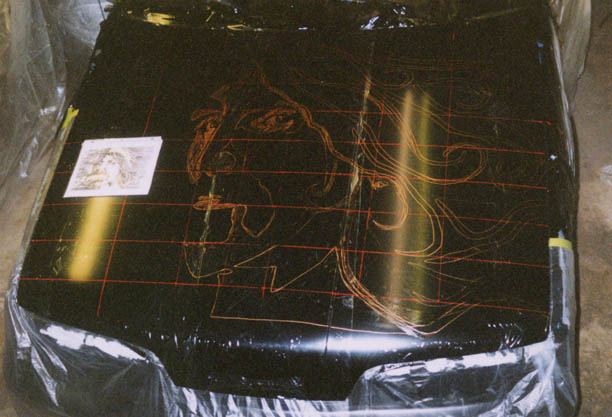
24. This picture shows how I stabilized my measuring tape with a piece of tape so I wouldn't need a second person. I marked off measurements and created a grid that would correspond with the small pencil drawing I made. Above is a scan of the original drawing, before the grid was drawn onto it.
|
|
25. This picture shows the gridded drawing being transferred to the hood. Here, I have finished drawing most of the face. To the left, you can see the paper drawing setting on the hood. Red paintmarker was used to make the grid and copper paintmarker was used to draw Zappa's face. Once the drawing outlines were fully transferred, I used an exacto-knife to carefully cut out the design. Harlequin color-changing lacquer was airbrushed on and the stencil was removed. Unfortunately, I discovered the hard way that stretch mask does not work well with lacquer paint. The paint that oversprayed onto the mask tended to just slip off in a sheet and stayed attached to the paint job on the car instead of to the mask. It was a mess! Although, without being able to draw right on the stretch mask, I don't know how I would have gotten such a large, pre-planned design on the hood very easily.
|
|
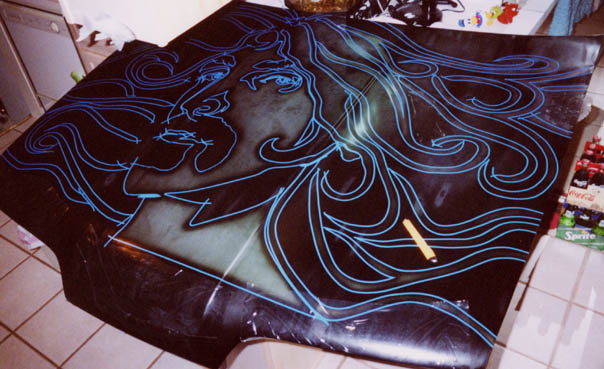
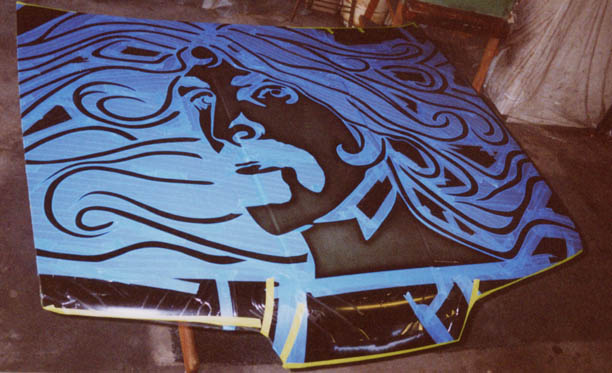
26. I decided to wet-sand the hood (not so much that the design would be sanded off---just to fix the mistakes). These pictures show the hood on my kitchen counter. I brought it inside for the taping process (since it was so hot out and the tape gets very gooey and leaves a lot of residue when it is peeled up). I used 1/8" plastic tape for tight curves and details and 60-day painters tape to cover larger areas. I used stretch mask only for a few very large areas to be blocked out. It took about 12 hours to tape off the hood. This time, I used a large spray gun instead of an airbrush to spray on the Harlequin paint. It worked much better and was more evenly applied, although now the surface of the design was raised quite a bit above the black paint.
|
|
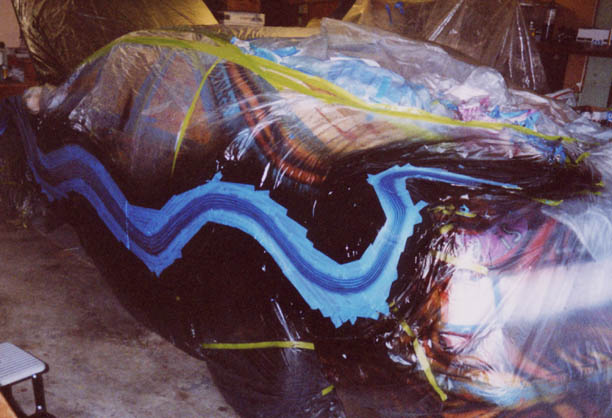
27. Next, the musical staff was taped off and painted. It took about 10 hours just to tape off the staff! In the pictures above, the left side of the staff has been painted with Harlequin but the right side has not yet been painted.
|
|
28. Once the staff had dried, I used stretch mask to transcribe the notes to the guitar solo for "Rat Tomago" from the Frank Zappa album "Sheik Yer Bouti." First I drew them on, then I carefully cut the notes and symbols out with an exacto-knife. These pictures show the result after the acrylic enamel was sprayed onto the stencil.
|
|
29. The above pictures show the result after removing the stencil and covering. Luckily, the stretch mask worked better with the acrylic enamel. The enamel overspray remained stuck to the stretch mask instead of peeling off and staying stuck to the car. At this time, I also hand-painted the symbols on the trunk. I would probably hand-paint the notes if I do something similar again because there was less of a raised edge on the symbols than the notes. The raised edge on the notes would be very difficult to sand down without removing parts of the note.
|
|
30. Next, the covering was removed from God's Eye and the whole trunk was given a clear coat of acrylic urethane. The sides of the car were then clear-coated (not pictured) and the hood was cleared separately. The tape on the lights and windows was finally removed (it had been on for a month) and some of the rubber bumper coloring came off with the tape. I wouldn't recommend leaving the same tape on so long. It should be peeled off and re-taped periodically, as much of a pain as that would be. I'll be doing that next time.
|